Run iTunes from a USB DriveTutorial: How to make a mobile iTunes Library & Sync your iPod without a computer
 Wish you could free your iTunes Library from your computer and take it with you in your pocket? GetUSB.info put together an excellent tutorial on how to run a mobile iTunes Library from a USB stick or hard drive. This method will run the entire iTunes application from the storage device, making it easy to manage iTunes libraries from a single location. I believe this is how iTunes should have be developed. Having a library specific for each computer is a frustrating way to enjoy your music if you use multiple computers everyday (ie. work, home, laptop, etc.).
What pushed Greg from GetUSB.info over the edge, was his wife wanting to purchase music from iTunes at work and then sync up iTunes with her computer at home. Typically this is done by purchasing the music and downloading directly to the iPod. But his wife is a CPA and travels from location to location for audits and doesn't even use the same computer all the time. The solution was to run iTunes from a USB flash drive so she could just manage a single Library.
It's worth mentioning this does not get around the five license authorization for running iTunes purchased music, rather this is a method to manage your iTunes library from a single location for multiple computers.
Here is a quick summary so you know what you are getting into:
- Create an autorun file for the USB drive
- Create a batch file to auto-launch iTunes from any computer
- Install iTunes on the USB stick
- Install iTunes on any computer to run from the USB drive
Of course this method also works for larger storage hard drives - basically anything that appears as a Mass Storage Device on your PC system. If you are looking for a long term strategy for managing your iTunes music, I strongly recommend doing this process to an external hard drive that is, at least, 120GBs.
Requirements:
- Any iPod
- PC with iTunes
- An iTunes Library that you want to move onto a USB stick or hard drive
Step 1: Creating the Autorun file
The autorun file tells the host computer what you want to do when the USB device is plugged into the computer. This step creates a single click auto-launch for iTunes.
- Open Notepad and type the following:
[autorun]
icon=\iTunes.ico
open=iTunes_mobile.bat
action=Mobile iTunes
label=Mobile iTunes
shell\open\command=iTunes_mobile.bat
shell\open=Mobile iTunes Save the Notepad document as 'Autorun.inf'
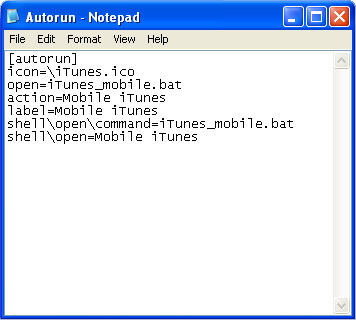
- If you want a cool looking icon than pay attention to the first line 'icon=\iTunes.ico' and place your ico file in the root of the USB drive (get one here). If you don't care, delete the line.
Step 2: Creating the Batch file
Next create the batch file needed to automatically run iTunes upon connection of the USB drive. Please note you need XP Service Pack 2 or Vista for the autorun feature to work..
Open Notepad and type the following:
set APPDATA=%~dp0Application Data
if not exist "%~dp0Application Data" mkdir "%~dp0Application Dataset HOMEPATH=%~dp0Documents and Settings
if not exist "%~dp0Documents and Settings" mkdir "%~dp0Documents and Settingsset USERPROFILE=%~dp0
set ALLUSERSPROFILE=%~dp0
echo starting iTunes
start \iTunes_programs\iTunes.exe- Save the file as 'iTunes_mobile.bat'
- With these two files, the autorun file and the iTunes_mobile.bat file we are ready to move along to installation.
| NERD NOTE: iTunes is available as a free download for Mac OS X, Windows Vista, Windows XP and Windows 2000 from Apple's website. It is also bundled with all Macintosh computers, and some HP and Dell computers. |
Step 3: Installing iTunes
Install iTunes to your PC as normal - not the USB drive!
While iTunes is installing on your PC go over to the USB drive and create a folder named 'iTunes_Programs'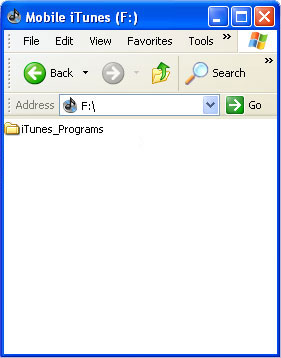
- When the iTunes installation is complete on the PC copy EVERYTHING from 'c:/Program files/iTunes' into the new folder of the USB drive 'iTunes_Programs'
- Once this is complete create another folder on the USB drive 'iTunes_Installer' Drag the iTunesSetup file into this folder. We use this when installing iTunes on future computers.
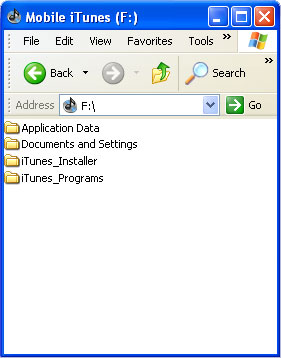
- Now that we have iTunes on the PC and we have everything on the USB drive, run the iTunes_mobile.bat file. Here a screen will flash then disappear and iTunes will open with a blank library.
- During this process you will see some additional files and folders created on the USB drive. This is good - everything worked as planned. Now, everything should look like this after adding the autorun file, bat file and ico icon file along with running the iTunes_mobile.bat file:
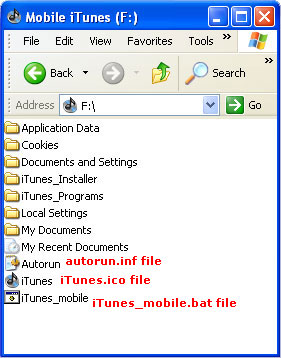
Step 4: Loading your USB drive
Next create the batch file needed to automatically run iTunes upon connection of the USB drive. Please note you need XP Service Pack 2 or Vista for the autorun feature to work..
Your USB drive is now ready to accept content. Drag-n-drop everything from the host computer under /My Documents/My Music/iTunes Music/ to the USB drive under /My Documents/My Music/iTunes/iTunes/iTunes Music/
Your file path might be slightly different if you customized iTunes from a previous installation. This process might take some time depending on the size of your library.- Once the copy process is complete run the iTunes_mobile.bat file again and everything will appear in it's place. Simply double click the 'iTunes_mobile.bat' file. If you are missing the song ratings on the USB drive, go back into the PC iTunes and run an 'Export Library' which creates an xml file. In the USB drive iTunes run the 'Import Library' feature to read in the xml file - your ratings should be restored.
Step 5: Checking the Autolaunch
At this point you probably haven't disconnected the USB drive. Do that now.
Reconnect the drive and the following window should appear.
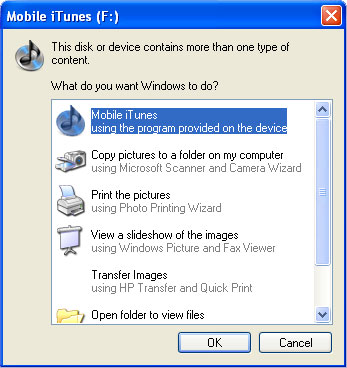
- When you double click on the Mobile_iTunes icon listed first, iTunes will launch and use the library from your USB flash drive! Nice.
- Congratulations you are running iTunes from your USB drive.
Step 6: Installing iTunes on a different computer
So you are at work and ready to run your iTunes from a USB drive. This is what you do.
Plug in the USB drive, but DON'T click the Autorun icon which pops up (and we created). Rather, close the pop-up window and navigate to the USB drive from My Computer.
Right click on the USB drive/stick and click "Explore"
Open the 'iTunes_Installer' folder on the USB drive and double click the iTunesSetup.exe file. Run the installation.
- Once the iTunes installation is complete you'll have a blank iTunes library on the new PC. That's OK, close iTunes.
- Now click your iTunes_mobile.bat file. This will open iTunes with your Library from the USB drive. Done! Congratulations you are running iTunes library from your USB drive on ANOTHER computer.
Step 7: Bonus
So here is the bonus. If you perform this USB tutorial on a large USB hard drive, chances are that external enclosure has additional USB ports. Now connect and sync your iPod to the USB drive, forget connecting the iPod to your PC. You can sync, grab podcasts, whatever, without connecting the iPod directly to your computer.
0 Comments:
Post a Comment